Be in the Know
Elevate your industry knowledge with PT articles and insights crafted by experienced industry experts
Elevate your industry knowledge with PT articles and insights crafted by experienced industry experts


You don’t have to be a personal trainer to know that push-ups are probably one of the most popular exercises around. This popularity is with good reason, too; push-ups are great for building upper body strength, stability in your shoulders, and tightness through your core.
Add to this the fact that they provide a really good calorie burn as an exercise that recruits lots of muscles (the pecs, triceps, deltoids, core muscles), and the fact that they can be done anywhere, by near enough anyone. Push-ups really are pretty hard to beat.
But, despite their simple nature, there’s often more than meets the eye with push-ups, and not everyone get’s them right every time. So, how do you do the perfect push-up? And what progressions are available? Let’s investigate…
Let’s start here. Push-ups are so often done badly, it’s pretty scary. There is no singular ‘perfect’ way to do push-ups, but the CrossFit movement standards are pretty good for protecting your joints, as well as building really good range of motion.
Lie flat on the floor with your hands stacked underneath your shoulders (this hand width recruits more pectoral and triceps muscle fibres than a wider base, and is more stable than a narrower base), knees and toes touching. Your elbows should be tucked in towards your body, not splayed out to the sides.
Think about the line of your body – your head, shoulders, back, bum, knees and toes are all in a straight line – this should be the position you continue to hold throughout the movement.
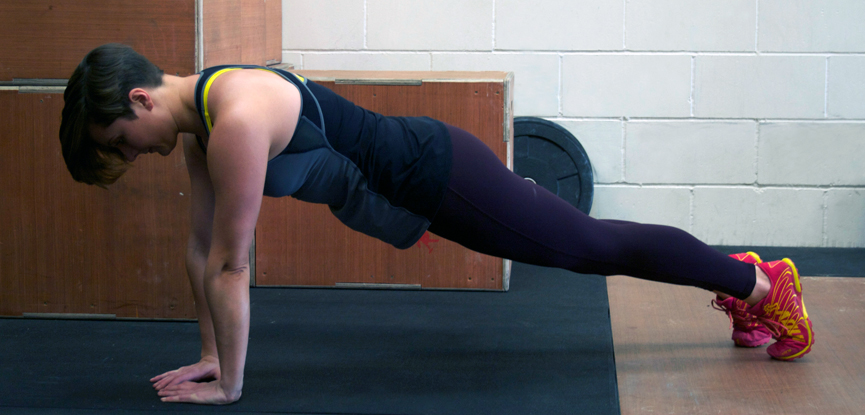
Pushing the ground away from you, straighten your arms until you reach full extension at the elbow joint, keeping that straight line from your head to your toes. Your arms should be fully straightened at the top, otherwise you are completing partial reps. Lower yourself back towards the ground, keeping your elbows tucked in and your body in a straight line, until your chest touches the ground.
The only thing that changes from progression to progression is the angle you are working from. Whatever progression you take, the alignment of your body and the movement of the shoulders and arms should be the same.
A lot of people who think they can do lots of standard push-ups may find themselves struggling once they take the above movement standards into consideration. This is where progressions (and regressions) come into play. The pain of moving backwards in terms of the level or difficulty of push-up is well worth the benefit in terms of muscle recruitment and protection against joint dysfunction.
Let’s start with the most basic of push-ups and work our way up.
Wall Push-Up
The easiest version of a push-up you can do is standing in front of a wall. This is really good for beginners, older adults, those with weak cores, etc.
Box Push-Up
The next progression is the box push-up, where you use a box, bench, chair or windowsill to aid you.
Ring Push-Up
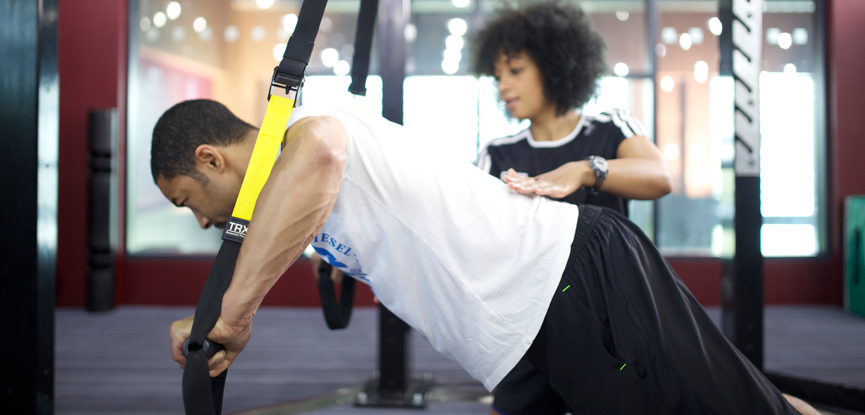
This progression introduces the use of instability. The rings are just one way to add instability; you could also use a bosu ball, stability ball, TRX/suspension trainer, etc. Perform the push-up as per the box push-up, only this time with the added instability.
Decline Push-Up
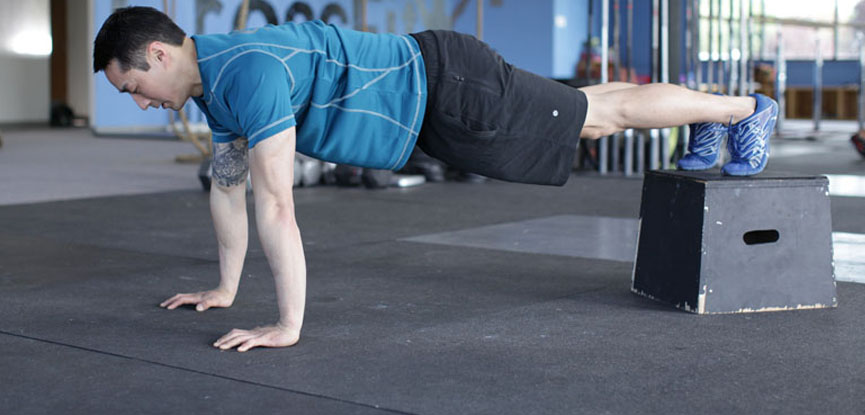
This progression loads more of your bodyweight into your hands, adding resistance. With your feet on a box/chair, ball, or in the handles of a TRX/suspension trainer, perform a push up as per the standard push-up. The higher the box/chair the harder the movement will be. If you use a ball or TRX/suspension trainer the instability will be harder.
Handstand Push-Up
The hardest progression of a push-up is a freestanding handstand push-up. This arguably takes the chest mostly out of the movement and could be classed as a completely different movement, but in CrossFit it is linked to the push-up.
You can start with handstand push-ups against a wall, and then move on to freestanding ones – perhaps the most impressive calisthenic movement!
Hopefully this article has shown you that the push-up really is accessible to all, but commonly performed incorrectly. The standards detailed here are enough to take you from partial reps and poor form, to repping out tens of perfect push-ups with practice.
Steering clear of common ‘cheats’ like sagging at the hips, piking, splaying your elbows (which actually just puts the shoulder joint at risk) or completing partial reps, will help you build strength and range of motion in what is still classed as a good test of strength.
Georgina Spenceley is a full-time business analyst, part-time sports massage therapist, freelance fitness writer and a lover of all things CrossFit.
And get the fast-paced world of personal training delivered straight to your inbox every week
Great news, you're on the list...